Work That Wig provides information, reviews, and tips on beauty, wigs, hair, products, fashion, and more!
Sunday, June 16, 2019
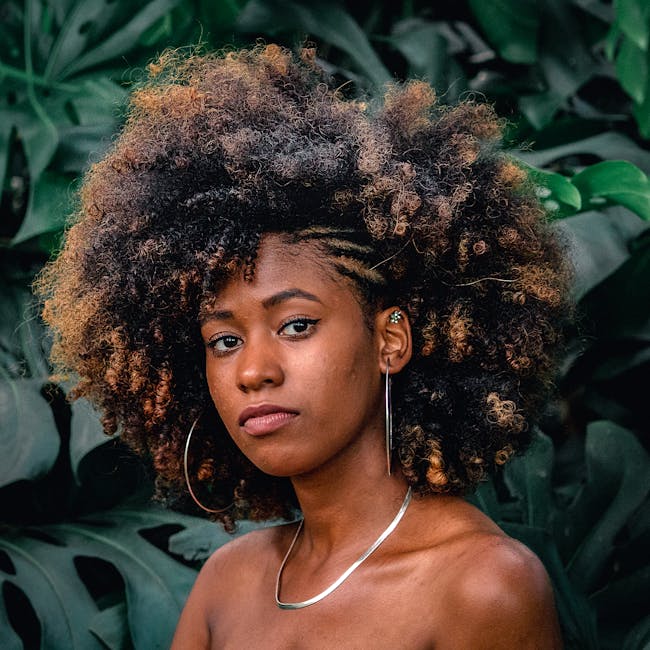
Brazilian Hair Weave bundles for sale In this video we will share Brazilian hair weave bundles for sale the benefits of Brazilian hair and why it is the most popular texture on the market at present Brazilian hair is the most sought-after texture on the market right now this is as a result of every one out of three women prefer Brazilian hair weave bundles this hair is used diversely because of its softness durability and density (thickness} this texture is easiest to blend with most ethnicities from some Caucasian textures to African-american relaxed textures Brazilian hair is extremely luxurious and very soft with a lot of body and natural shine its luster is low to medium Brazilian hair weave bundles for sale because of the density of Brazilian hair you may not want to use as many bundles as you would normally use with other textures to create a full look due to its natural density with this hair less is more also because of its density it is less likely to frizz than other hair types like Malaysian or Indian hair Brazilian hair will also hold curls longer than Indian or Malaysian textures this hair is extremely versatile it's amazing buy Brazilian Hair Weave bundles for sale by clicking on the link in the description
Friday, June 14, 2019
Here we are in step number three of the u part wig tutorial using Mrs. Rutter's hair extensions from MrsRutters.com in this step I'm going to be teaching you how you need to sew your hair extensions once your dome cap to create your u part wig so here we are in our u part wig tutorial where I'm going to be teaching you how to sew your extensions but first I want to show you how you want to create your markers on your wig cap so that you know exactly where you want to stop so there's three red marks on the cap there's two on both sides and there is also one at the top now when you're measuring the width of where you want your markers to be it has to be the width of your leave out so in a previous step I've stated the width you want your hair to be as well as how far back you want your braids to be so the width of my leave out is 3 inches and that's how far I have mine measured now the length back will consist of how long your actual braid is that's next to your leave out the length of my braid is 4 inches to match my wig clip so I measured back 4 inches with a measuring tape and I made a marker there to show what you want to stop now we are at the point where I'm going to be also teaching you how to sew your extensions but right before I do that I am going to show you really quick how you want to thread a needle threading a needle is simply connecting thread onto your needle so that you can sew your extensions onto your dome cap now if you have multiple needles this will help the process continue to go on instead of always rethreading one needle at a time as your sewing your extensions so for example I;m going to show you how you want to thread your needle so I have my needle here and this is a c needle also called a curved needle because of the shape so you want to do is grab one end of your thread and you want to put it through the eye of the needle when you do this you gather the two ends together and your create a knot now after you create your knot you are going to grab your scissors and you are going to snip off the thread right above the knot the reason why is because when you create your first knot you don't want a lot of thread hanging through because it will show through your extensions so that simply how you thread a needle so now that you understand that I'm going to go ahead and teach you how you want to sew your extensions now when you're sewing extensions you have to do so in a U-shaped fashion meaning that the direction of your extensions as is being sewn on your wig cap is going in a U-shape when you're sewing make sure that every time you reach the edges of your actually wig cap that you go through the edge here so that if you ever do decide to wear your u part into a ponytail or anything like that there is no cap showing or any weft showing whatsoever so now at this point I've left my needle and thread intact and I am going to teach you how to sew your extensions through this point here and we are going to go through the cap and I'm also going to teach you the fold-over method with the end of the extensions here so to create your knot you are going to go through your cap you are Going to go under your weft come back out from under your weft and you want to create a knot in this area so through the cap under the weft and when you pull through you are going to do a knot technique that I like to teach now this knot technique consists of you wrapping the needle around the string twice and pulling through to create a knot this is the same process you are going to do throughout all of your extensions so now you are just a little bit of space and you repeat process through your spandex cap right underneath the weft of your extension wrap the string around little twice and pull through to create your knot so you are going to continue to sew on until you reach the edge and you are also going to do that when you reach the edge as well when you reach the edge you make sure to put your needle directly through the edge of the cap so that way it's very flat right against the perimeter of it so we go right to the edge of the cap you are going to go underneath your weft and do the same thing do that once again going over just a little bit of space through the edge of the cap and create another knot and when you run out of string you simply can just cut off the thread and then continue with the rest of your threaded needles o just open up your thread to tighten the knot cut the string off and then continue sewing and then do your flip over which is what I'm going to teach you so now we are at the tail end of our bundle of hair of the 24 inches when you're sewing your extensions make sure you start with the longest extensions in the back and then work your way up to the shortest length so at the back will be 24 inches and then 22 inches and then 20 so now we are at the point where I am going to teach you that infamous fold-over method and what the fold-over method simply means is you fold your weft back over so that you can begin sewing in the other direction so they can keep following your U-shaped fashion the reason why the fold-over method is so important when sewing on your extensions is because it prevents you from actually needing to cut your extensions so the entire time you will continue to do fold-over methods to sew in all of your extensions without cutting through the weft every time you cut through the weft of your extensions you increase the risk of shedding in that cut area so that's why the fold-over method is preventing so you fold-over and then what you are going to do was you are going to go through the cap and then when you go under the weft you are going to go under both of these weft to create that knot once you do that you are going to wrap the string around twice around the needle and pull through to create your knot now every fold I suggest that you secure your fold with 2 knots before you move on by stitching so now that your fold is secured you are going to begin stitching up to finish off the 24 inches and then you are just going to continue with your next the length of hair so as you can see this is a finished results of the u part wig with all of the bundles sewn in all three bundles are included of 24 inches 22 inches and 20 inches of Mrs.
Rutter's hair extensions from MrsRutters.com as you can see with the very last track that was sewn on you want to make sure they each knot is as close as possible to one another because as you are wearing your wig this is the area that has the most friction from your comb and styling and things like that so to prevent the threads from wearing and tearing and beginning to unravel it's very helpful to make sure that the knots are extremely close to one another now that you have finished creating and sewing all of your extensions onto your dome cap now in the very next step, step number four I'm going to be teaching you how to sew on your wig clips.
Human Hair and
Synthetic Hair have advantages and constraints that make them the ideal option at
different times. Both are terrific choices for you depending on your budget
plan, time, and needs. We will talk about five reasons to choose synthetic over
human hair.
Human and Synthetic Differences
Synthetic hair wigs are made up of synthetic fibers that are
far sturdier than human hair. Possibly the most popular benefit to artificial
wigs is that they come currently styled and have the capacity to hold a
particular design regardless of the problems. So even if it's damp, it will not
go kinky or level.Human hair wigs are made from real
human hair, so they look and feel real, however, they likewise have to be
restyled after washing similar to actual hair.
Low Maintenance
One of the most enticing facets of synthetic hair is its low
maintenance. Synthetic hair can typically be used right out of the package with
little or no styling. The fiber used has "memory" for wave, crinkle, and
volume which lets hair get better into the area with marginal initiative, the
crinkle pattern is completely established. It can also stand up in bad weather and
can assure no drooping or frizzing. Synthetic hair is additionally less
resilient than human hair.
Looks Just Like Human Hair
With technical advancements, synthetic hair has actually
come a long way in recent years. In many cases, it is tough to tell the
difference because the density and appearance are such that they feel virtually
like human hair. As a matter of fact, with some of the better artificial
pieces, you would certainly never ever recognize they were not natural human
hair if you really did not have the human hair right next to it to compare. It
looks just like human hair.
Color
Human hair is going to discolor over time, it's going to
come to be a little bit duller. The sunlight can defeat on your head all day
long and the shade will certainly remain equally as you see it here, it will
not discolor, it will not oxidize, it will look much like it did right out of
the package as well as you cannot really state the very same for human hair.
Heat
Just unique heat-friendly synthetic hair is heat styleable
to transform the crinkle pattern. Human hair wigs can get uncomfortable, especially in hot climate areas.
Financial Saving With Synthetic Hair
Human hair is much more costly because of its authenticity, but
you can obtain a little bit of time and financial savings with synthetic hair.
This short layered synthetic wig has a lace front. It has a curly afro texture and a hair length of 14-Inches. This beautiful wig can be
worn casually or for an all-girls night out.
This salt
and pepper color-haired wig is capless and has a straight texture. Its 12-inch length falls beautifully and gives a natural look.
Synthetic wigs come in a variety of styles. While human hair
most definitely takes a great deal even more time than artificial hair, synthetic
hair can basically be worn right out of the bag.
For more information on these types of wigs and other
similar products, visit the sites below.
Hello, guys today I will be making another video on how to make a wig using 360 frontal. The 360 frontal I am using today is from our mere collection with matching weft. Color is 1B/99J You will need to following accessories: Spandex cap, elastic band, comb, thread, and needles. This is how your spandex cap should look. Position your frontal on your dummy head over your spandex cap. Secure with T pins.
Start sewing around the top lace of your frontal through your spandex cap. After this is done you can start sewing on your extensions. Sew from one side to the other. When you have reached the last track connect the frontal by sewing both the weft and frontal together. I am styling this wig my usual way with heated rollers. Cut the lace off following the hairline pattern. Then cut around your spandex cap leaving only the middle. After this is done sew on your comb and elastic band.
I will be using our big-size band today. Before wearing use your foundation to tint your lace. This is how my wig looks after it's finished. I have been feeling unwell the last few weeks. When I am feeling better, I will make another video wearing this wig. I love the color and just can't wait to wear it. Thank you for watching. All the products used in this video are available on our website. I have left all the links in the description box. I appreciate your support.