I like legitimately don't know how they're gonna take like the difference though because I've been growing it for like a whole year and then all of a sudden I've just cut it all off so they're gonna be like really you're filming at you okay really okay guys yeah Wow I do have a lot of explaining to do and thanks for watching this video but it's a way did I fool anyone no I'm just kidding with you you guys know I would not spend a whole year and a bit growing my hair out just to chop it all off right it is definitely a day for wings I'm actually really excited about this video so if you want to know more about these male wigs keep watching okay hello everybody and welcome back to my channel my name's Thomas if you're brand new here and I make Stalin he related videos style and wig videos every single week here on YouTube so if that's your kind of thing make sure you hit the subscribe button and come back next week so what are we doing in today's video we are definitely trying on wigs and I just wanted to cover why I even went for this right cuz usually I do a lot of hair videos about my own hair if you've been following me for a while now you'll know I've been talking a lot about hair growth and really really waiting out the growing out process and I thought man what if I wanted to just have short hair for a minute it's totally possible but not only that wigs are really great thing for guys that are balding guys that are feeling maybe a little bit ashamed about not having so much hair or even for guys that just want to change up their look you know it's 2018 we are all able to express our individuality these days and that is my main message so why not I felt like wigs definitely fell into the bucket of Thomas in action so here we are also I'm gonna be giving myself a little bit of a challenge today I'm gonna be answering every single comment that comes onto this video in the first 24 hours okay so if you've ever wanted to have your questions answered or just say something to me you better believe in the first 24 hours of this video going live I will be responding to every single comment and that means even if there's a thousand comments I'm gonna be responding to a thousand people don't challenge me okay I'll see you in the comments see ya hey you air has been kind enough to provide us with these two wigs they didn't actually reach out to me and do a brand deal this is not sponsored I was just thinking of really cool content ideas that I could put out for you guys and I reached out to them and I said hey your wigs look really cool really realistic and I want to scare the shit out of my audience so what do you think and they happily sent me over to wigs the two bigs were trying today edge and daring and I will be leaving links to these in the description box below it doesn't really matter what your your reasoning for wanting to wear a wig is I mean they're pretty cool thing to try and the hair line on these is freaky obviously I couldn't get these in the mail and not try them straight away I have tried them already and let me tell you learning how to wear a wig is a process in itself so I'm gonna be doing it all for you today and showing you what I've learned over the last couple of weeks so I thought we'd cover the structure of the wigs first seeing is like my first impression of a wig was a wig from crazy clucks which is like the cheap shop and they're probably the worst wigs you could probably ever buy I didn't really notice how much actually goes into the cap of these so if we unfold it like this we've got all of these which you call the wefts I learnt this term actually when my friend Travis turned me into a drag queen we he taught me about these being the wefts of the wig so they're what the hair is actually stitched to and then at the front here you've got the lace front cap the lace front cap is essentially just like a bit of mesh with all of the hairs stitched into it so when it sits on your forehead about here you it just looks like a normal hairline that's what it's supposed to do and there's all different types of things you can do to make your wig look a lot more realistic so by wearing a wig cap you can like tuck all your hair back and yeah we're gonna do it today I actually just cannot wait to start doing it for you so without further ado let's get into it I've shown you the inside of the wig when you do get a wig as well you have to be very gentle and very careful with it because the hair has been stitched into this thing and if you're too rough with it the hair obviously can fall out and unfortunately with the wig the hair doesn't grow back go figure anyway alright let's get to it in the section of beginners for wigs or wigs for beginners I kind of just thought I need to get all of this hair to sit as flat as possible and a wig caps gonna help me do that but if I don't have something else to pin my hair down or make it more closer to my head then I'm kind of gonna have trouble with it it's gonna look all bumpy and lumpy so what I'm gonna do is I'm actually gonna tie these little tiny elastics around the bottom of my hair my hair still a bit damp so still moldable which is cool and then tie this one back as well well this is gonna look so groovy step one is I just tied them like this the back and then what I do is just get a thousand bazillion bobby pins and I'm gonna try I'm gonna make it as flat as possible right that's the deal I took another one in it so got those pinned up I've actually got like a thousand bobby pins ready to go because my hair is that unruly it just does whatever the hell at once whenever it wants so then once we got that sit in I'm just gonna do a little bit here I really can't wait to see their reaction alright that's looking pretty good to me that's like as close to my head is I'm gonna get it and not being a professional I don't know how drag queens do this all the time man like they're they're dedicated alright now it's time for the wig cap this is where it gets really freaky looking as well so kind of like morphs over my whole head I'm only a newbie at this as well alright give me a break also if you feel like your wig caps not sitting properly you can use like a big wad of tape over your head I've seen drag queens do it before but because I'm not a drag queen and I just don't have the resources for it I just kind of I'm gonna go with what I have today wig 101 I thought I was gonna try the edge one on first but I think I actually want to try the daring wig on first so this one's more of like a ashy blonde color very very different and if we have a look at the hairline of this one as well the hairline is completely different to my normal hairline my normal hair lines quite jagged as many of you have pointed out in the comments section below before but yeah we're gonna try this bad boy on and here we go so let's get him on is he on the biggest yes we'll adjust that milker he has velcro on the inside of him as well and now it's time to put him on whoa surfer man Wow I think you can also get wigs cut to the way that you want them as well so if I kind of wanted to go to the hairdresser and get this one cut to a little bit shorter on the sides I could probably do that to give it more of an undercut kind of look for the most part it's actually it's such a different look compared to what I'm used to Wow and that hairline though like look at it so you can see it like flap up there that's what it looks like but like when you put it down it kind of just blends in and kind of like goes in with my skin like I don't think you can tie these up like a man bun either like because you'll all the whips wefts will get exposed to it oh look at that that looks pretty cool what do I look like to you leave me a comment hey you know what I could even potentially passes something from Dragon Ball Z I'm like a Super Saiyan or something like that so this is daring guys just wanted to show you that close up have another close look at the hairline there all right now let's get edge on we'll try the other wig on and yeah get into it all right now I'm taking that one off I'm gonna reapply these wig caps surely there's like a more like sturdy method to do England caps I guess on my wig journey I'm gonna have to figure it out a little bit more but for now these bad boys or we've got to play with okay time to try this guy on I look like I could be part of kpop right now oh come on hairline yeah see if I like tuck that hairline up right there you that's too far forward like whose hairline comes to there it just doesn't work like that so obviously you've got to work the wig back but the trouble is like mmm I think this one actually might be a little bit too small for me but it does look pretty cool I can't believe how much it like changes my face I look so much younger that's the first the wig cap staying in place it's about making it look as realistic as possible now I don't even think these sideburn bits are like for a young kid I don't think they're that in fashion I mean this would definitely go well an older guy or it's like a Leonardo DiCaprio look if you know what I mean like back in the day when he was super super young you don't see too many young guys rolling around with this right now but I guess in terms of wearing a wig for a day like I guess you could rock it like easy little more believable hey it's crazy and the actual hair itself looks quite realistic like it looks like real hair but I've pretty sure they are synthetic I'll give you a back look at this one as well it's so weird I haven't seen myself with short hair for so long so yeah let me know what you guys think of this one as well this one's called edge and the colouring of these also comes in multiple different colors you can get them in blonde you can get them in lighter brown dark brown there you go there's the Hale and it looks quick looks pretty disguised there doesn't it yeah this is my real hair line what I think my head is a little bit bigger than most people as well so this one definitely takes a minute to get right but once you do it's actually pretty cool-looking so yeah guys that is me trying on these how you wear wigs from the hem range I really hope you enjoyed this video and I'd be really keen to know your thoughts or how I made you feel when I first started this video with short hair I just can't believe it I haven't had short hair in so long so it's very very different and just remember if you want to wear wigs he'll just go and wear one go and get one make sure you know what your size is as well and make sure you do a little bit of research on how to put one on because they can be very tedious its 2018 remember that you can express yourself in whatever way you want these would also be a great thing for the growing out process if you are struggling with that awkward stage and you really want to kind of do something to make yourself look a bit different or cover up that bad hair day something like this could really work for you because they're quite realistic looking and yeah pretty funky in it anyway make sure you join the Facebook group if you haven't already as well hair styles in action and also keep in mind I will be responding to every single comment that comes in on this video within the first 24 hours so if you want you to comment responded to make sure you head down there straight after watching this video and I'll get back to you again if there's a thousand comments I will be replying to a thousand people other than that have great week and I will see you next week for another video okay goodbye men's hair piece men's hair pieces before and after boy wigs wigs for males male wig men's wigs men/s wigs that look real men's wigs human hair men/s wigs long hair men's wigs UK men's wigs and hair pieces.
Saturday, June 27, 2020
Wednesday, June 24, 2020
New Ideas to Renew Your Hair?
Watch this amazing compilation of hair transformations to colorful styles, and you'll definitely be able to choose a new favorite hairstyle!
Now some colors can give you a positive vibe And some other colors can give you kind of a negative vibe What we mean by that is when we think of the color white we can think of something as innocent and pure but at the same time when we think of white, we can think of someone as Kind of looking a little bit too pale a little but not really healthy or kind of sick Alright. So, let me give you an example of our favorite BTS RM. So he looks good with any hair color, Yes, he does, but he used to have black hair and ash hair from these two I mean personally I love both but the majority of the staff says that the ash hair really matches his complexion a little bit more.
on the other side black hair, I don't think brings out his hotness. Now, let's look at Irene from Red Velvet. Now. She looks fabulous with all her hair colors. However, with her yellow hair, she looks a little bit, her tone looks a little bit more yellowish and with the dark brown hair, her complexion looks more lively and more vibrant. Yes, we can definitely tell that for our favorite idols choosing the right hair color is very important. But for us, too! It's very important that we choose the right color, but it's still kind of difficult to figure it out outright. But don't worry guys that's why we're here with What's Trending and we're gonna give you some recommendations for your hair color that matches you also we have a FAQ session towards the end for those of you that might have questions about dyeing your hair.
Also, let's figure out which season you fall under I think a lot of people make the mistake of saying if you have a lighter color Automatically your cool tone, and if you have a darker skin tone you're automatically a warm tone but this is not the case. For example, a warm tone has a yellow base and a Cold tone has a blue base. For example. Rihanna is winter cool tone and Nicki Minaj is summer cool tone Alright. Now before we start our self-diagnosis test, I really want to give you some pointers that you should keep in mind Number one rule is to make sure that you have no makeup on, because if you do have a different base color on we can't really figure out your true skin tone So number one no makeup while you're doing this test.
And number two no accessories for the same reasons, and number three: Make sure that you do it in natural or white lighting Because if you are under a different color lightening it can kind of change the color of your skin tone. Fourth do this diagnosis objectively. What I mean by that is I look good with all the colors. Yes, I do That's what I think, so it's gonna be kind of hard for me to do this test But we do have to do it objectively if you are not sure if a certain color matches you or not You can actually ask your friends.
That will be the answer. Alright. So let's move on to our self-diagnosis test. We're gonna select either A B C or D Just choose one. Okay. All right. Number one: what's a lipstick color that looks good on you? A: peach pink; B: rose pink; C: salmon pink; D: magenta Number two: what kind of image do people think you have? A: A lovely and lively image B: A mature, calm image C: A girly, fresh image D: A urban, chic image Alright number three: what's your eye color? Now a tip here if you're not exactly sure what eye color you have all you gotta do is take a selfie and then Zoom in to see what color your eyes are.
A: yellow tone; B: light brown; C: green, blue, or brown; D: dark brown or black Number four. For number four, make sure A and C is together and B and D are together. So you can choose one between the two. A and C says: You easily tan when out in the sun for long periods of time B and D says: Your skin gets red and it burns when you're out in the Sun for long periods of time. Number five: A and C is gold jewelry looks good on you B and D says silver jewelry looks better on you Number six: A and C Your hands look prettier with brown or orange manicure B and D says your hands are prettier with red pink or blue manicure A and C says the veins on your wrists are green under natural lighting.
For B and D, the veins on your wrists are blue under natural lighting. Now check which ones you have the most from ABC and D. And that is your personal color. For those of you that have even numbers of ABCD. That means you have neutral personal color So this means a is spring warm B is summer cool C is autumn warm and D is winter cool. Alright guys, so did you check which color is your personal color? Now, let's move on to our hair recommendations Yeah, spring warm tones. Have a more calm vibe.
When you guys match with warm colors, you have a more vibrant, lively complexion. lively complexion for you guys is more characterized by a yellowish hair base and Also light brown eyes and a brighter skin tone to recommend the hair colors for you guys are Kotori beige coral beige light olive-brown Cinnamon and caramel and other light brown colors. Some things to avoid are blue color and black color we recommend that you stay away from bluish tones. Some of our favorite idols with the same personal color as you are Bts's Jin and we have IU Suzie, Sully, and Yoon-ah.
You guys can check out their style and hair colors as well for some inspiration. Sommer cool tones Have a fresh cool image and very clear skin tone as well So for you guys match really feminine and innocent makeup. Dark brown hair color and gray hair color Really freshen up your skin complexion and remember to stay away from yellow-toned hair colors, okay? And some of our favorite idols that have the same color as you are BTSs Jimin and Irene from Red Velvet Dayton from Twice, Taeyeon from SNSD My favorite, my lover, G-Dragon.
Moving on to autumn warm tone. This gives off a very healthy, tanned look. It's often that you have a yellow-toned complexion without any red and that you have dark eyes and dark hair Now, the good news for you guys is actually can choose from a variety of hair colors because there are a lot of choices for you guys. The colors that suit you guys are brick brown, chocolate brown, and orange-toned auburns. and a lot of people are really curious about ash tones and you guys are very very lucky because fall warm tones look really good with ash colors.
If you have medium or darker skin tone and you have ash hair, those two colors can clash with one another so it's best that you avoid it And it is also best to stay away from reddish colors like Marcella and burgundy so for some of our favorite idols that have the same personal color as you we have BTS J-Hope, and also one of my favorites, Jenny from Black Pink and we have Seol-Hyun and Lee Hyori. For winter cool tones, you have cool, translucent-like skin. This personal color is complemented by bright colors, and you are more urban and very sophisticated.
For you guys, you have no redness in your skin complexion, and you probably have dark hair and dark eyes. black is the best color for you guys and also on the very opposite side, jet blonde hair will see you guys really well. So remember to stay away from colors That's very in between and also for some of our favorite idols with the same personal color We have Hyunah and Chaeyeon from Twice. so I hope that you guys enjoyed our hair recommendations for spring summer fall and winter and we also recommend that you try out the hairstyles of the idols that have similar personal colors as you guys did.
Now here's an FAQ session. We did think that you will have some questions about your personal colors So let's get started. Can it be changed by acquired traits? Your personal color shouldn't change, but the colors that do look good on you might change a bit. What I mean by that is I might get a little bit tan during the summertime So a certain color would suit me better and in the winter I may get a little bit lighter and another different type of colors will suit me better so keep this in mind that it might change a little bit.
Ah, I thought the same. Good question. So what you can do is buy new clothes, it's definitely an option that you can do. However, realistically that's really difficult. So what you can do is, let's say before I had darker clothes and everything in my closet is super dark and black. However, I figured out that with my personal color a brighter color on me looks better. Then what I would do is on the bottom, I can keep the darker clothes, and on top, whatever is the closest to my face I would switch it up to brighter colors And another example is let's say that you don't want to switch up your top You want to keep your tops? Then you can wear dark colors and then add a jacket or something on top with a brighter color So it will match your personal color.
Yes, baby Yes, I feel you on this one because There are certain colors. I mean, I look good with every single color, You know what I'm saying? But some people do tell me that I look better with brighter colors But I love darker clothes like I love wearing all black all the time. So this was kind of a dilemma for me So I do feel you on this one What you can do is just because we tell you that this color fits your personal color It doesn't necessarily mean that it's the Bible that you have to follow by the rules.
We recommend that you experiment So make sure that wherever that you're gonna wear this outfit to that event you kind of match to see if that color would fit the event itself and you try it, you experiment girl You do what you got to do, you know? So don't ever limit yourself. Alright, guys. Thank you so much for tuning until the very end. Don't forget to subscribe and click on the notification button that little bell next to or subscription button so you will know every time that we upload.
The next episode on our channel will be Wishtrend TV vs. Acene, so stay tuned for that also! Thank you guys so much for tuning in till the very end to hang out with me I hope this was very helpful for you guys. Remember you guys are beautiful just as you are! I love you guys so much I'll see you guys next time. Bye
Wednesday, May 27, 2020
Wigs for Men, a New and Creative Fashion
It was a time when some men thought that baldness was a curse. It was a sign
of aging. Losing one hair was embarrassing for some, so men did anything
from buying toupees to wearing full wigs to cover it up.
That was then. Today a man can look good bald or with a full head of hair.
With all the creative grooming mechanisms we have today, grooming yourself
has become a way of life.
Heterosexual, Metrosexual, whatever sexual label, a well-groomed man gets a
lot of attention for his creative style.
One way to enhance that style is with a wig. That might sound funny to
some but for many men out there that like to switch up and make a statement,
a wig can do just that.
From wigs to toupees, to braids, and weaves, whichever you are comfortable with,
can bring a new different look to a man’s character.
Like a woman, a man can have options in the way he dresses and the hairstyles he wears. Do not worry about not being able to look “Macho”, the wigs
of today are made to fit almost perfectly for a man as well.


For more information on wigs and other related products click below:
 |
| The Process of Putting on a Wig |
 |
| 5 Reasons to Choose Synthetic over Human Hair |
Saturday, July 6, 2019
The Process of Putting on a Wig

We're going to go through
the process of putting on a wig. We do want to emphasize, that this is one
way of putting on a wig. Depending on the wig and your type of hair, please
choose the way that’s best for you. Remember, this is not the only way or the
right way, it's just one way of doing it.
Prepare Hair if Needed
Start with your hair prepped as well as flattened under a wig cap. Make sure hair is flat and there are no bulges or sticking out hair. If you have longer hair. Split it into two sections and use bobby pins to pin it up. (If needed apply a powder that matches your complexion to the wig cap).
Stocking Cap
Today we're going to actually go through the process of installing a wig. The video before this, in case you missed it, showed you in preparation for installing the wig. This one, we're going to actually go ahead and put the wig on. Again, I want to emphasize that this is the way I do it. By no means is it the only way, by no means is it the right way, it's just the way I do.

Start with the wig cap. Wig caps are needed due to the fact that they secure your hair from possible damaged while putting on a wig. You do not have to, it's totally optional. If it's not your preference you can skip this step, but It is highly recommended, especially for people who have long hair, a lot of hair, and larger heads because it does help keep your natural hair flat so that the unit lays flat as well. Some even double up on their wig caps, especially if you have a lot of hair, some find that doubling up gives extra flatness that may be needed.
Wig Grip Bands

The next thing is adding a wind grip band. The above photo is how a wind grip band looks. I will leave a link below for more information. Wig grip bands are very inexpensive, they can run anywhere from $3 to upward of $20, but they are great to use, especially if you have issues with your wigs shifting, you have a lot of hair, any of those issues. They are good to have, and it is suggested that every wig wearer should have one. You can use this with or without a stocking cap.
Put on Wig

Establish what type of wig component you want and readjust the wig as necessary. The whole process takes about five to seven minutes. Starting in the front, locate the wig on your head. Now make sure the wig is in place, and you want to make sure you put the hairline directly on the wind grip band, but still cover it up. Once the wig is on, adjust accordingly. With the needed amount of force, pull it down on your head to make sure it is secure in place.
Get in front of a Mirror and Style
Hair Spray
Next, you may find that
you have flyways or maybe you need to work on your band, and that's when hair
spray will come into play. You can get any kind of hairspray you like. This is
just going to keep your hair in place for holding however, you decide how to
style it.
Use Flat-Iron

At this point, you may find yourself needing to add some heat to the wig. Make sure your wig is heat-safe before you do this. Start low and then work your way up. You can use your heating tools to style the wig at this point, and flat iron it. You can also use it to smooth down the top of its puffy.
You can use a curling wand or use a flat iron because the sides have the heat plats, and it works just fine. If you do have a wand, it might work better. At this point, you're ready to work on your part. This is where you can make the wig look really natural by actually blending it with your skin tones.
The process of putting on a wig is not hard. If you are wearing
a wig for the first time, hopefully, this post will be of some help. For more
information on these and other similar products, please visit the sites below.
 |
| 5 Reasons to Choose Synthetic over Human Hair |
 |
| Wigs for Men, a New andCreative Fashion |
Sunday, June 16, 2019
Brazilian Hair Weave bundles for sale In this video we will share Brazilian hair weave bundles for sale the benefits of Brazilian hair and why it is the most popular texture on the market at present Brazilian hair is the most sought-after texture on the market right now this is as a result of every one out of three women prefer Brazilian hair weave bundles this hair is used diversely because of its softness durability and density (thickness} this texture is easiest to blend with most ethnicities from some Caucasian textures to African-american relaxed textures Brazilian hair is extremely luxurious and very soft with a lot of body and natural shine its luster is low to medium Brazilian hair weave bundles for sale because of the density of Brazilian hair you may not want to use as many bundles as you would normally use with other textures to create a full look due to its natural density with this hair less is more also because of its density it is less likely to frizz than other hair types like Malaysian or Indian hair Brazilian hair will also hold curls longer than Indian or Malaysian textures this hair is extremely versatile it's amazing buy Brazilian Hair Weave bundles for sale by clicking on the link in the description
Friday, June 14, 2019
Here we are in step number three of the u part wig tutorial using Mrs. Rutter's hair extensions from MrsRutters.com in this step I'm going to be teaching you how you need to sew your hair extensions once your dome cap to create your u part wig so here we are in our u part wig tutorial where I'm going to be teaching you how to sew your extensions but first I want to show you how you want to create your markers on your wig cap so that you know exactly where you want to stop so there's three red marks on the cap there's two on both sides and there is also one at the top now when you're measuring the width of where you want your markers to be it has to be the width of your leave out so in a previous step I've stated the width you want your hair to be as well as how far back you want your braids to be so the width of my leave out is 3 inches and that's how far I have mine measured now the length back will consist of how long your actual braid is that's next to your leave out the length of my braid is 4 inches to match my wig clip so I measured back 4 inches with a measuring tape and I made a marker there to show what you want to stop now we are at the point where I'm going to be also teaching you how to sew your extensions but right before I do that I am going to show you really quick how you want to thread a needle threading a needle is simply connecting thread onto your needle so that you can sew your extensions onto your dome cap now if you have multiple needles this will help the process continue to go on instead of always rethreading one needle at a time as your sewing your extensions so for example I;m going to show you how you want to thread your needle so I have my needle here and this is a c needle also called a curved needle because of the shape so you want to do is grab one end of your thread and you want to put it through the eye of the needle when you do this you gather the two ends together and your create a knot now after you create your knot you are going to grab your scissors and you are going to snip off the thread right above the knot the reason why is because when you create your first knot you don't want a lot of thread hanging through because it will show through your extensions so that simply how you thread a needle so now that you understand that I'm going to go ahead and teach you how you want to sew your extensions now when you're sewing extensions you have to do so in a U-shaped fashion meaning that the direction of your extensions as is being sewn on your wig cap is going in a U-shape when you're sewing make sure that every time you reach the edges of your actually wig cap that you go through the edge here so that if you ever do decide to wear your u part into a ponytail or anything like that there is no cap showing or any weft showing whatsoever so now at this point I've left my needle and thread intact and I am going to teach you how to sew your extensions through this point here and we are going to go through the cap and I'm also going to teach you the fold-over method with the end of the extensions here so to create your knot you are going to go through your cap you are Going to go under your weft come back out from under your weft and you want to create a knot in this area so through the cap under the weft and when you pull through you are going to do a knot technique that I like to teach now this knot technique consists of you wrapping the needle around the string twice and pulling through to create a knot this is the same process you are going to do throughout all of your extensions so now you are just a little bit of space and you repeat process through your spandex cap right underneath the weft of your extension wrap the string around little twice and pull through to create your knot so you are going to continue to sew on until you reach the edge and you are also going to do that when you reach the edge as well when you reach the edge you make sure to put your needle directly through the edge of the cap so that way it's very flat right against the perimeter of it so we go right to the edge of the cap you are going to go underneath your weft and do the same thing do that once again going over just a little bit of space through the edge of the cap and create another knot and when you run out of string you simply can just cut off the thread and then continue with the rest of your threaded needles o just open up your thread to tighten the knot cut the string off and then continue sewing and then do your flip over which is what I'm going to teach you so now we are at the tail end of our bundle of hair of the 24 inches when you're sewing your extensions make sure you start with the longest extensions in the back and then work your way up to the shortest length so at the back will be 24 inches and then 22 inches and then 20 so now we are at the point where I am going to teach you that infamous fold-over method and what the fold-over method simply means is you fold your weft back over so that you can begin sewing in the other direction so they can keep following your U-shaped fashion the reason why the fold-over method is so important when sewing on your extensions is because it prevents you from actually needing to cut your extensions so the entire time you will continue to do fold-over methods to sew in all of your extensions without cutting through the weft every time you cut through the weft of your extensions you increase the risk of shedding in that cut area so that's why the fold-over method is preventing so you fold-over and then what you are going to do was you are going to go through the cap and then when you go under the weft you are going to go under both of these weft to create that knot once you do that you are going to wrap the string around twice around the needle and pull through to create your knot now every fold I suggest that you secure your fold with 2 knots before you move on by stitching so now that your fold is secured you are going to begin stitching up to finish off the 24 inches and then you are just going to continue with your next the length of hair so as you can see this is a finished results of the u part wig with all of the bundles sewn in all three bundles are included of 24 inches 22 inches and 20 inches of Mrs.
Rutter's hair extensions from MrsRutters.com as you can see with the very last track that was sewn on you want to make sure they each knot is as close as possible to one another because as you are wearing your wig this is the area that has the most friction from your comb and styling and things like that so to prevent the threads from wearing and tearing and beginning to unravel it's very helpful to make sure that the knots are extremely close to one another now that you have finished creating and sewing all of your extensions onto your dome cap now in the very next step, step number four I'm going to be teaching you how to sew on your wig clips.
5 Reasons to Choose Synthetic over Human Hair
|
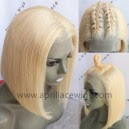
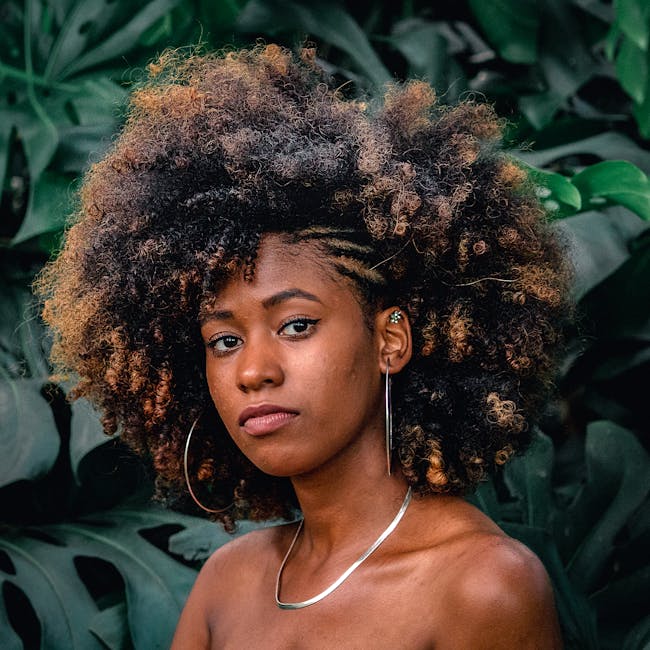
Short Length Afro Curly SyntheticHair Wigs Capless Wig |
 |
Short Bob Hairstyles Women'sBig Curly Human Hair Capless Wig |
Human Hair and
Synthetic Hair have advantages and constraints that make them the ideal option at
different times. Both are terrific choices for you depending on your budget
plan, time, and needs. We will talk about five reasons to choose synthetic over
human hair.
Human and Synthetic Differences

Synthetic hair wigs are made up of synthetic fibers that are
far sturdier than human hair. Possibly the most popular benefit to artificial
wigs is that they come currently styled and have the capacity to hold a
particular design regardless of the problems. So even if it's damp, it will not
go kinky or level. Human hair wigs are made from real
human hair, so they look and feel real, however, they likewise have to be
restyled after washing similar to actual hair.
Low Maintenance
One of the most enticing facets of synthetic hair is its low
maintenance. Synthetic hair can typically be used right out of the package with
little or no styling. The fiber used has "memory" for wave, crinkle, and
volume which lets hair get better into the area with marginal initiative, the
crinkle pattern is completely established. It can also stand up in bad weather and
can assure no drooping or frizzing. Synthetic hair is additionally less
resilient than human hair.
Looks Just Like Human Hair
With technical advancements, synthetic hair has actually
come a long way in recent years. In many cases, it is tough to tell the
difference because the density and appearance are such that they feel virtually
like human hair. As a matter of fact, with some of the better artificial
pieces, you would certainly never ever recognize they were not natural human
hair if you really did not have the human hair right next to it to compare. It
looks just like human hair.
Color
Human hair is going to discolor over time, it's going to
come to be a little bit duller. The sunlight can defeat on your head all day
long and the shade will certainly remain equally as you see it here, it will
not discolor, it will not oxidize, it will look much like it did right out of
the package as well as you cannot really state the very same for human hair.
Heat
Just unique heat-friendly synthetic hair is heat styleable
to transform the crinkle pattern. Human hair wigs can get uncomfortable, especially in hot climate areas.
Financial Saving With Synthetic Hair
Human hair is much more costly because of its authenticity, but
you can obtain a little bit of time and financial savings with synthetic hair.
Below are some synthetic
wigs trending today.

This short layered synthetic wig has a lace front. It has a curly afro texture and a hair length of 14-Inches. This beautiful wig can be
worn casually or for an all-girls night out.
This short layered synthetic wig has a lace front. It has a curly afro texture and a hair length of 14-Inches. This beautiful wig can be worn casually or for an all-girls night out.
Shaggy
Men's Short Wavy Capless Synthetic Hair Wig

Men’s short shaggy synthetic wavy wig. Get a natural masculine look with this capless wig. It has a hair length of 10-Inches. A great manly look!
Short
Bob Hairstyle Curly Synthetic Hair Capless Curly Wig

This curly texture short bob wig gives a sexy but soft look.
It has a hair length of 8-Inches and looks great for just about any occasion.
Women's
Salt and Pepper Medium Layered Straight Synthetic Hair Capless

This salt
and pepper color-haired wig is capless and has a straight texture. Its 12-inch length falls beautifully and gives a natural look.
Synthetic wigs come in a variety of styles. While human hair
most definitely takes a great deal even more time than artificial hair, synthetic
hair can basically be worn right out of the bag.
For more information on these types of wigs and other
similar products, visit the sites below.
Subscribe to:
Posts (Atom)
Lace Front Wigs